Wednesday, September 9, 2015

A short jaunt to Denver for the Weekend.

Last weekend we had about 24 hours to unpack our things from Yosemite, do laundry, and repack it all for a trip to Denver.  We like to travel, but this was by far the tightest we've ever scheduled trips.  Actually, the trip to Denver got tacked on after Jeremy found out he needed to travel there for work.  I figured, if he got to go enjoy the mountains, then we were coming too, at least for the weekend.

So Sunday we spent the day turning around laundry and Monday morning Jeremy was off to Denver while I stayed home with the kids for the week.

Thank goodness for daycare!  Phew.  Single parenting for the week certainty wasn't easy, but we made it through with only a few minor hiccups.

Thursday night came and we were off to Denver.  I previously sent Jeremy with the clothing and diapers, so I "only" had to manage two kids, a stroller, diaper bag, Max's toy bag, and two car seats.  Max was a very good traveler and only tried to run away from me once in the airport.  (Actually, he was walking to the window and someone stopped him in such a way that he thought it was a game, so helpful stranger but not really.)


We arrived in Denver, got the car and made it to the hotel by about 1:30am.  Yea, late night for sure.  Max was hyped up to see Daddy and we were all up until 2:30.  Yikes!  Needless to say, Friday morning was a late start.

Friday - Georgetown Loop Railroad & St. Mary's Glacier

Friday we ventured out to the Georgetown Loop Railroad and took a short ride through the mountains.  Max was pretty excited to be on a train, but also still pretty tired from the night before.  This turned out great because Jeremy and I were able to eat lunch in quiet for a few moments before Jesse woke up for a feeding.  Why is it they can't both sleep at the same time.  Just 30 minutes!


choo choo

After the train ride we headed up to Saint Mary's Glacier for a little hiking.  It had started to rain at this point but we decided to grab the rain coats and umbrellas and do the hike anyway.  As it happened, the rain stopped after about 15 minutes and we had a great hike.  Max walked about 1/3 of the way up going across the rocky trail with careful footing.  It was great for his balance and he kept saying "slippery" when he would get knocked off balance.

The trail tops out at a lake with a view up of the glacier which is so tiny at this point that it seems that it won't be there at all in a few years.  We didn't do the hike up to the base of the glacier, instead opting to stay by the lake for a while and have a snack, throw stones, and take pictures.

at the top of the lake before the glacier

hiking up the path

what a cutie

lake with the glacier in the background

throwing stones

Friday night we ate dinner at Ted's Montana Grill before heading back to our hotel in Bloomfield.  (We stayed at the Hyatt House and found it very nice and accommodating.  The room was very big which was great for fitting a king bed, pack and play, and a toddler inflatable bed).

Saturday - Rocky Mountain National Park

Saturday morning we got another late start, but we managed to get up to Rocky Mountain National Park by 11:30am.  Late by my standards but Jeremy and the boys seemed to enjoy the relaxed morning.  We started to head up to the top of the park but quickly realized that we wouldn't be able to do both the drive to the top and the Alberta Falls hike if we had any intention of eating dinner at a reasonable hour.  So, we aborted the drive and headed back down to the Glacier Gorge parking area to do the Alberta Fall hike.  Along the way we stopped at this overlook and took some great pictures of the kids.


The Glacier Gorge Trailhead parking was super packed at 1pm and after driving around it and the Bear Lake Trail parking area several times, I finally managed to grab a spot by following a woman to her car.

This is by far one of my top 10 (maybe even top 5) hikes that we've done.  It's beautiful and just really allowed us to escape into nature for a while and spend time together as a family without any distractions.  Sure it took us a while to do the hike, but that's because Max walked the entire 1.7+ miles to the falls and back all by himself!  Yep, I am so proud of my little guy!  Each time he would stop at a bridge crossing to throw stones we would tell him that we had to keep moving so we could make it to the really big waterfall.  Man, the look on that kids face when we rounded the corner to Alberta Falls.  "WOW.  Big Big Waterfall!" he said with amazement.

If you're in the area, definitely put Alberta Falls on your short list of hikes to do, simply gorgeous and only 200 feet of elevation gain over .8 miles.

photo op!

the "big big waterfall"

tossing rocks with daddy

Following the hike we headed to Tavern 1929 for dinner.  I was impressed with the food and it is very family friendly.  Jeremy felt the beer was good, though I opted for the house pinot and the house cab, both of which were excellent.  Unfortunately, while Jeremy and I were hungry, Jesse had plans of his own.  He was not happy and we spent the entire dinner with one of us rocking him while standing up.  Because of course you can't sit down.  Never sit down.

The evening was capped off with ice cream in Estes Park.

Sunday - Boulder & friends

On Sunday we spent a very relaxing morning in Boulder.  We hit up Pearl street around 10am and surprisingly stayed there until about 2:30.  There's a lot of fun stuff for the kids to do including a boulder area to climb on (complete with a bridge and a fake river), a splash pad, and animal sculptures to also climb on.  There's also a toy store and a microbrewery (West Flanders Brewing Company).  The food at the microbrewery was actually quite good and the restaurant has all kinds of toys and legos for kids to play with while the adults ate their meal.


That afternoon we headed down to visit our friends, Lew and Kathleen, just outside of Golden.  After convincing Lew that ice cream was not an appropriate dinner for anyone, especially a 2 year old, we headed first to dinner and then ice cream.

It was a nice relaxing day and a great opportunity to catch up with friends.  Max liked Lew and Kathleen so much I think next time we will just drop him off and sneak out the back door :)


Make the jump HERE for the rest of the pictures from this awesome weekend getaway.

Visiting Yosemite

What a whirlwind these last few weeks have been, and it's not slowing down until next week!  Someday my boys will look back at these stories and realize how crazy their mom was for planning so much into such a short amount of time.

Two weeks ago we were able to finally visit Yosemite National Park.  Though we've lived in California for over a year, it took us this long just to get reservations somewhere!  And, because I didn't realize you could book a year out, our next years trip will also be in the fall as opposed to the spring, oops.

Yosemite is about 3 1/2 hours from our house.  That's 3 1/2 hours for people without kids.  For us, it took us about 4 1/2 to get there and about 5 to get back.  There were several stops to feed Jesse, grab a bite to eat, and let max burn off energy at a park.

When we first drove into Yosemite, around 1pm, we were immediately entranced by the beauty of the mammoth granite mountains.  When we came upon a 3500 foot sheer granite face, there was no question that we were looking at El Capitan.  Simply stunning.

El Capitan

Because of the severe drought in California, many of the iconic waterfalls were dried up or slowed to a trickle.  There was no point in visiting Yosemite Falls or many of the others.  So we opted to spend our time and take a grand overview of the park.

Our first day we hiked to the Vernal Falls footbridge, about 1.9 miles round trip on the Mist trail.  It was slow going and Max was carried most of the hike.  Not because his little legs couldn't do it, more on that in the next post, but because the sweet simple developing mind of a little child is just as amused with the rock on the trail as he is with the destination and the journey.  Every step, every rock, ever puddle is a journey to him.   I try to sit back and watch and just take in all the little moments.... but at some point you've gotta keep moving!

starting the trail

hiking up the trail

We made it to the footbridge.  Jesse was not amused.

After Vernal Falls we had dinner at the curry village pizza patio and beers from the bar right beside it.  The patio was very lovely, pizza was on the good side, and the beer, Tioga Sequoia Half Dome wheat, was delicious.

After dinner we checked into our hotel, Yosemite Lodge at the Falls, and crashed out.  (at 3 months old, we didn't think Jesse was quite ready for camping, so we opted for the lodge).  Our room was small but had enough space for a pack and play and even had a queen bed and a double bunk bed.  Somehow Jeremy or I wound up in the bunk bed and Max wound up on the queen with the other one of us.  Still not sure how that happened each night.

The next day we did the Cook's Meadow hike.  We started across the street from bus stop #6 and more or less followed the directions online.  We had spectacular views of the valley and half dome.  We stopped at Degnan's deli for some lunch sandwiches to go and hit up the gift shop for a shirt for Max and Jeremy.

Cook's Meadow

Loves the binoculars

Simply stunning

After returning to the room to finish our sandwiches, we headed down to the Swinging Bridge (doesn't swing at all) and spent a few hours on the beach.  The Merced river that runs through Yosemite has several small sandy beach spots that are perfect for escaping the heat.  We had just purchased a beach canopy and between the mesh sides and the small portable fan, Jesse was in heaven.  The water temperature was about 70 degrees, but it felt so great.  For a while I just sat in the water looking up at the granite mountains thinking to myself how lucky I was to be able to visit such a beautiful place.  We enjoyed our time at the beach so much that we actually went back two days later to have some more water fun.

Best beach ever.

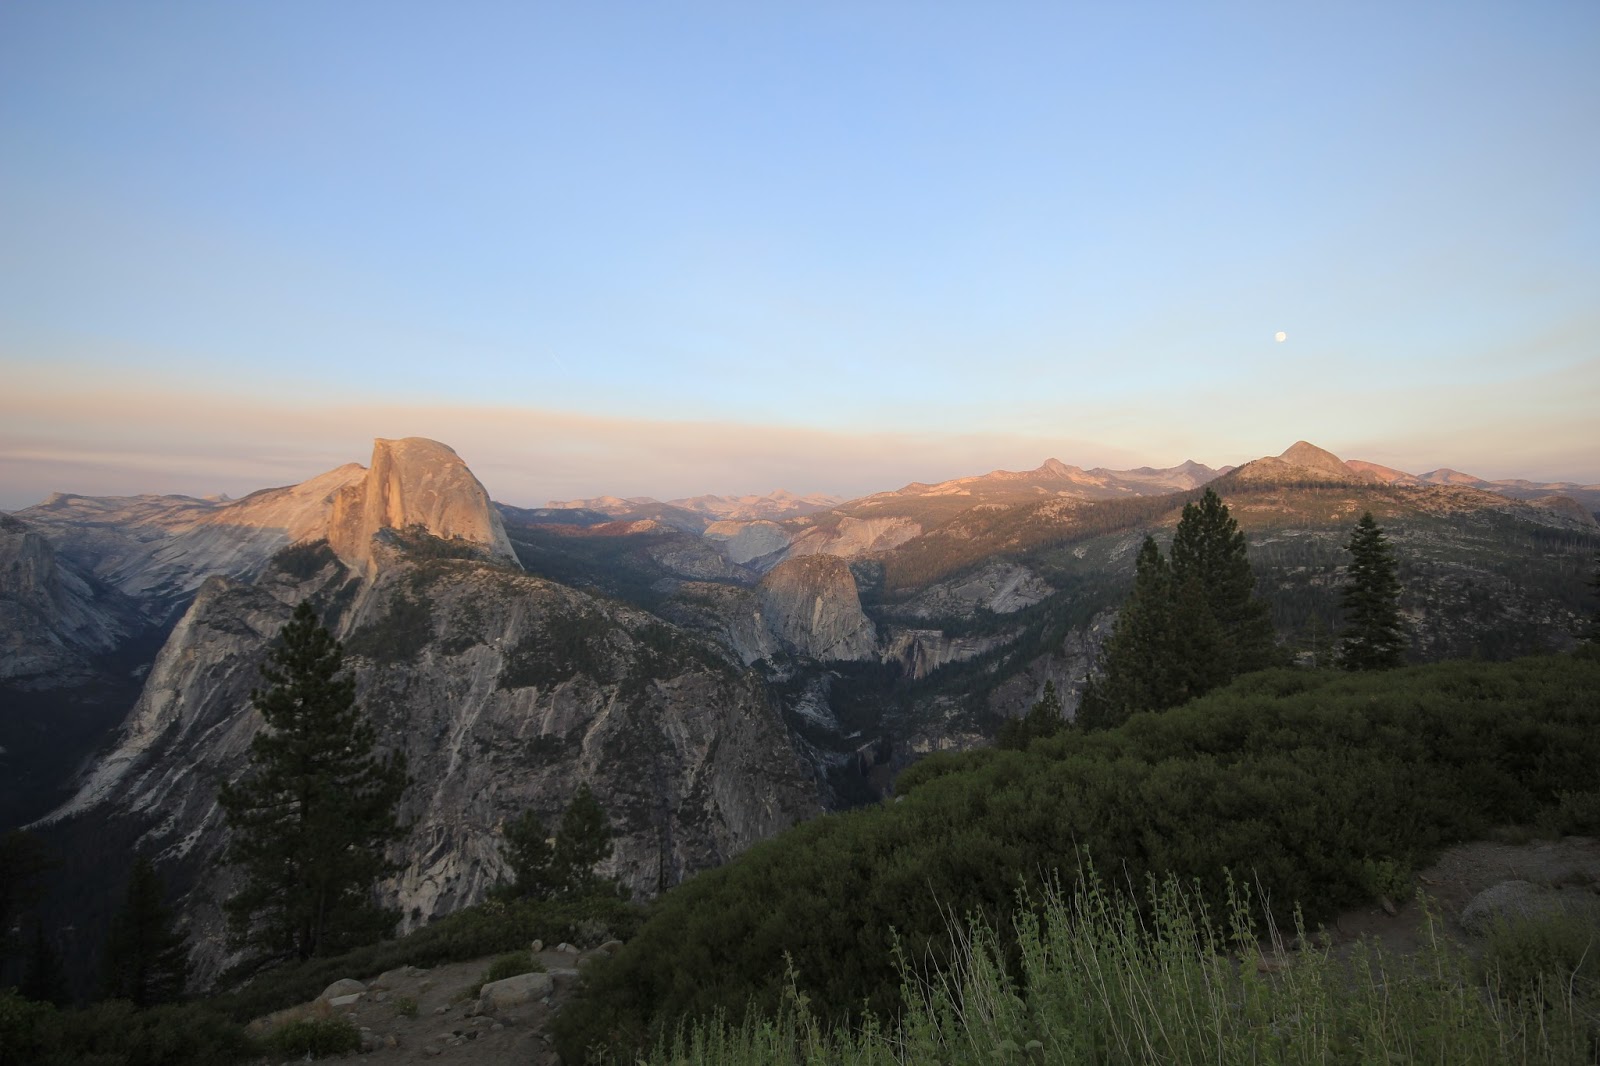
That night we drove up to Glacier Point for sunset.  It is very beautiful up there, but absolutely terrifying if you have kids.  I made Max stay in the stroller the entire time, only getting him out once to see the view.  And that one time he was out, I had the biggest death grip on him.  No no no no no, just sitting here typing I can't even think about it.

Family photo then back in the stroller

Glacier Point

The next day we headed up to Tuolumne Meadows.  Now, if you know anything about the geography of Yosemite, at this point you are probably wondering why we decided to do glacier point and then Tuolumne Meadows back to back.  The answer is simple.  We didn't fully appreciate how far away Tuolumne Meadows is from Yosemite Valley.... we do now!

After being very ansi in the car, I was ready to get out anywhere.  A quick stop by Tuolumne Meadows visitor center provided us with a map and a plan.  We decided to park at Lambert Dome, eat lunch that we brought (sandwiches from Degnan's again), then walk down to Soda Springs and the Tuolumne river.  It's about 3/4 of a mile in each direction, but it's a nice walk through open meadows culminating at a river and a cool geological attraction.

soda springs

photo op!

one of my favorites.  check out flickr for a better rendering.

Saturday was time to leave, but we decided to spend most of the day in the park and head out closer to dinner.  We stopped by the visitor center before heading back to swinging bridge and the Merced river.  Just as before, we throughly enjoyed our swim time.

We had a great time in Yosemite and will definitely be visiting again in the near future.  Make the jump HERE for the rest of the pictures.

Tuesday, February 3, 2015

Creating a tiered spiral cake with fondant decorations


Ever since Max's 1st birthday last June, I've been thinking about his 2nd birthday cake.  You see, I had some issues with the 1st birthday cake that can pretty much be summed up with this statement: don't put fondant decorations on cool whip icing.  They melt, they slide, they make a big sticky colored mess.

For birthday #2 we are going to do a train theme.  So i've been looking at google, pinterest, and everywhere else you can think of to come up with some ideas.  I now have 3.

Along my search I came across a few tiered cakes that did a spiral train track down the cake.  How cool.  So I spent hours reading blogs and trying to figure out exactly how to carve this spiral into the cake.

I just couldn't wrap my head around it.  One night while on travel for work, I literally stayed up so late making drawings on scrap paper that I only got 5 hours of sleep.  It's a bad obsession.

So last Sunday I decided it was test cake time.  The best way to learn is to do... so I did.

In this blog I'm going to go over how to make the spiral cake, and also some tips that I've learned over the years.  It's going to be a long post, but if you're making a cake, I think you will find it very informative.  It's also a way for me to remember what I've done :)

They're more like guidelines...

First, a few rules I've come up with for fondant and tiered cakes.  These come from my experience, reading blogs, and fixing mistakes.

1) freeze cakes overnight
 - if possible, use a denser cake on the bottom tier and lighter as you go up.  Super soft moist cakes don't hold up as well to heavy fondant (at least I've found).  Box cakes are doable, but can be more troublesome.  

2) assemble each layer separately, carving and filling as desired.  
- also cut the bottom board of each tier to the correct size at this point.
- you may want to put a pilot hole in the center of each cardboard at this point.  this will make it easier to drive the final center dowel into the cake once constructed.  

3) let sit on counter for 3 hours to allow crumb coat to harden and cake to settle and it to come up to room temperature
- can assist this with the use of light "weights", but the idea isn't to squish the cake, just to get the filling and cakes to settle.

4) add thin buttercream smoothing layer.  Use a glass of hot water to dip your metal curved spatula in while smoothing.
- your thick buttercream for tasting layers should be in the middle.
- For this layer, you do not want to let this one "harden" (like in the fridge or freezer) but just start working with your fondant and cover.  You want this layer to stay smooth and hardening it too much will cause it to become crusty and could cause bumps, which is the whole thing you are trying to avoid. 

5) fondant cakes.  
- do use corn starch on your hands and surface to prevent sticking
- do kneed and work the fondant a lot ... a lot a lot, until it pulls easily and is very very pliable.  If it's too stiff and hard it will crack.
- do elevate the cake or you'll get bunching around the bottom.  
- don't make fondant too too large or it will "pull" as it's draping and cause tares.  (test cake did this, but I had a very large piece of fondant so there was a lot of weight pulling it down in the back)
- Ask a helper to gently hold the fondant up on the back side if you're worried about it causing pulling on large tall cakes.  I haven't found this to be an issue on single layer cakes but on the cake below, the entire green part is one piece of fondant and it seemed to pull downward from gravity a lot while I was working with it.
- DO work very quickly getting the top and sides done.  (longer it sits, the more prone to tearing it is as it dries out).

HERE is a good quick blog about a simple fondant cake.  

6) add structure to each bottom layer with wooden dowels or smoothie straws
- To avoid repeating tips i'm going to link a few good sites here
WILTON - a good general overview with this pro tip: Finely shredded coconut or confectioner's sugar, placed in area where cake circles or plastic plates will rest, helps prevent frosting on the cake from sticking
Make Fabulous Cakes - very detailed. 
Dowels - these are plastic Wilton ones you can get on amazon.  I've also used wooden dowels and smoothie straws in the past.

7) assemble
- Don't forget the final dowel that goes through each layer

8) decorate

The spiral cake

The two blogs that I used to guide my direction on this cake were Cake Central and Baking in Faith.  I had some trouble following the end steps of Cake Central's explanation, but that's where just working with real cake helped a lot.

Also you'll notice two big differences in the above blogs.  The Cake Central blog talks about adding additional cake to make the second half of the spiral.  This leads to a bigger cake and a bigger top section.  The Baking in Faith blog simply uses the cake you already have.  This leads to a smaller top piece.  Because I wanted the ramp to go round the front, then down the back, then back around the front (for two ramp layers in the front), I needed to do something closer to the Cake Central approach.  (see picture at the top of this blog)

1st - make yourself a lot of cake.  Since I was just using this as a test cake and wanted a medium to use that would be quick, I used 4 box cakes (on sale for $1.50 each... score).  

Yes, you read that right, I used 4 box cakes.  It's a lot of cake.

I made 2 - 7" layers for the top of which I only needed one).  The 7" layer was 1lb 4oz of cake mix + pan.  

I also made 4 - 9" layers.  3 of the layers were 1lb 8oz, then the 4th layer was way heavy.  basically the rest of the cake.  I was trying to get a very thick cake so when baking the 4th layer, I dropped the temperature of the oven down to 300 deg and let it in there until set.  Probably 30-40 minutes but I wasn't keeping track.

In retrospect, I would do the following combination:
1 thicker 7" layer
3 normal 9" layers
2 normal 11" or 12" layers

As you'll see below, I used the thicker 9" layer to make the bottom of the ramp which was a bit tricky.  Ideally you'd want the inner diameter of your bottom ramp to be the same as the outer diameter of your bottom layer.  So a 11" or 12" cake would work better, as it would hold the shape easier.

1) arrange your cakes with filling inside and let sit for 3 hours to let settle.  (remember point 3 above?)  This cake was a chocolate cake with chocolate buttercream and raspberry filling.


2) measure in from the outer edge for the width of your ramp.  I used 1 3/4" for my ramp.  Use toothpicks and mark all the way around the center.


3) choose where you want your ramp to start and stop.  I wanted half the top to be the train track, then start down the spiral, so I picked half the cake to work with.


4) decide how steep you want your ramp.  I knew I wanted the majority of the ramp to be around the front, and since this was the back of the cake, I made this section less steep.  The ramp around the back side only went down the first layer.  

using toothpicks, place them at your start and end, then fill in the rest to create the downward spiral.


5) as you can see from this top down picture, the top circle unwinds at the point where the ramp goes down.  So I added a few more toothpicks to bring out the circle.  It' looks funny, but you'll see.


6) using a sharp knife, follow your toothpicks along the top toothpicks then along the spiral on the side.  I did this a few inches at a time.  


Here you can see the spiral start to take shape.


And here's the final part of the top spiral.  

7) now for the additional cake.  For this I started cutting the 4th thick layer that I made.  Because it was so thick I only needed to stack at the highest points.  But I really think you could do 2 normal layers and stack (and fill) them.  Also, this is where I diverged from the Cake Central blog above.  I couldn't figure out what she meant when she talked about cutting the cake flat then turning it up on end and I found my approach just as easy.


8) Measure in 1 3/4" (or your ramp diameter) into the cake.   If you use the suggested cake diameters above, this center ring will be the approximate diameter of the main cake which will make nesting easier.  Here you can see how tight the inner circle is, which made nesting the cake together a bit difficult.  Of course it may not be exact, unless you can find just the right shaped cake pans.  We're going for approximate here.


9) Using the 4th layer you just measured out, start adding cake around the bottom layer to create the bottom ramp.  (Again, you can also see what I was talking about earlier, how the outside diameter of the main cake should be the inside diameter of the ramp layer that you are adding, so they fit nicely together.  Because I used the same size cakes, the outer diameters were the same so it made it hard to fit the ramp on without breaks in the cake.  I had to have a lot of pieces, which doesn't help the structure at all.)

IMPORTANT - if you look closely you can see that I did not put icing between the main cake and the spiral cake pieces that I was adding.  this was a mistake!  it meant that the outer crumb coat was the only thing holding the spiral piece to the main cake and I could tell that caused some structural issues once the fondant was applied.  Do NOT forget to attach your spiral with more icing.  

If you look at the below picture, you can really see how important this is where the bottom spiral made of extra cake came to meet the main cake.  That's such a thin piece there that it pulled away from the main cake because I didn't do a good job 'gluing' it with icing.  This caused the fondant to bulge in that area, but I didn't notice until the next day after transport.  (and we all know transport doesn't help things)


10) now that you've added extra cake do the same thing you did above and measure the width of the ramp to be 1 3/4" (or whatever you are doing) and then mark your spiral downward for the bottom ramp.   Again cut in and then down to remove cake.  

Ta Da.  You have a spiral!


11) For the top piece I used that 7" layer and cut this weird shape.  As you can see in the final pictures below, I wanted the left edge to look like a mountain and tunnel so that's why the extra cake there.  Since I was doing a mountain I didn't care if it came exactly out to the edge of the main cake, because I could just fill in with fondant rocks.

12) Add a crumb coat to the entire cake and let sit to harden (or put in fridge)

13) Then add your smooth coat (which I forgot for this cake... it was getting late)

14) structure, fondant, decorate as detailed above in the first list.

Here is the final product.


Here I borrowed Max's "mo mo" train for effect, but I will probably look for smaller trains with more cars for the final product.  

You can also see the upper ramp that I talked about earlier.  If you look at the Baking in Faith blog that I mentioned above, then you won't get this upper ramp.  

I think if you thought about it enough, you could do a two ramp spiral using all one main cake (green part above), but you'd need a big cake to start with (maybe 12" for a 9" top with a 1 1/2" ramp).  You'd have to create a 9" circle around the top, then you'd have to measure 1/3 of the way down and cut in 1 1/2" to make sure you have the correct top section.  Then start doing the spiral.  As you cut the spiral around the front you'll be taking away more cake, so I think it would be okay.  I don't have it drawn off hand since I just thought about it while writing this, but I think its' doable and might lead to a more structural cake especially with the bottom ramp.  If I decide to go this route for the actual cake, I may have to give myself extra time and try that.  


Friday, January 23, 2015

Hiking the Cataract Trail

Last weekend we had made plans to hike the trail to the Alamere falls, however, we quickly realized that the hike was 8 miles round trip.  Not so much a problem for Jeremy and I, but we weren't so sure that Max was up for the challenge.

As I was reading reviews for the Alamere falls trial, I came across the Cataract trail.  A 3 mile round trip hike following a beautiful waterfall, lush green fauna, and a nice picnic area.

As it turned out, Max actually stayed the entire 3 miles in his backpack!  Amazing.

The picnic area was half way, so it was a nice spot to take a break, have lunch, and let Max run around.

This is definitely one of my favorite hikes in the Bay Area.  It reminded me a lot of hiking in Costa Rica and some parts of Hawaii.

During my search I also came across THIS SITE.  About some other great Bay Area hikes.  I'll have to check them out soon!